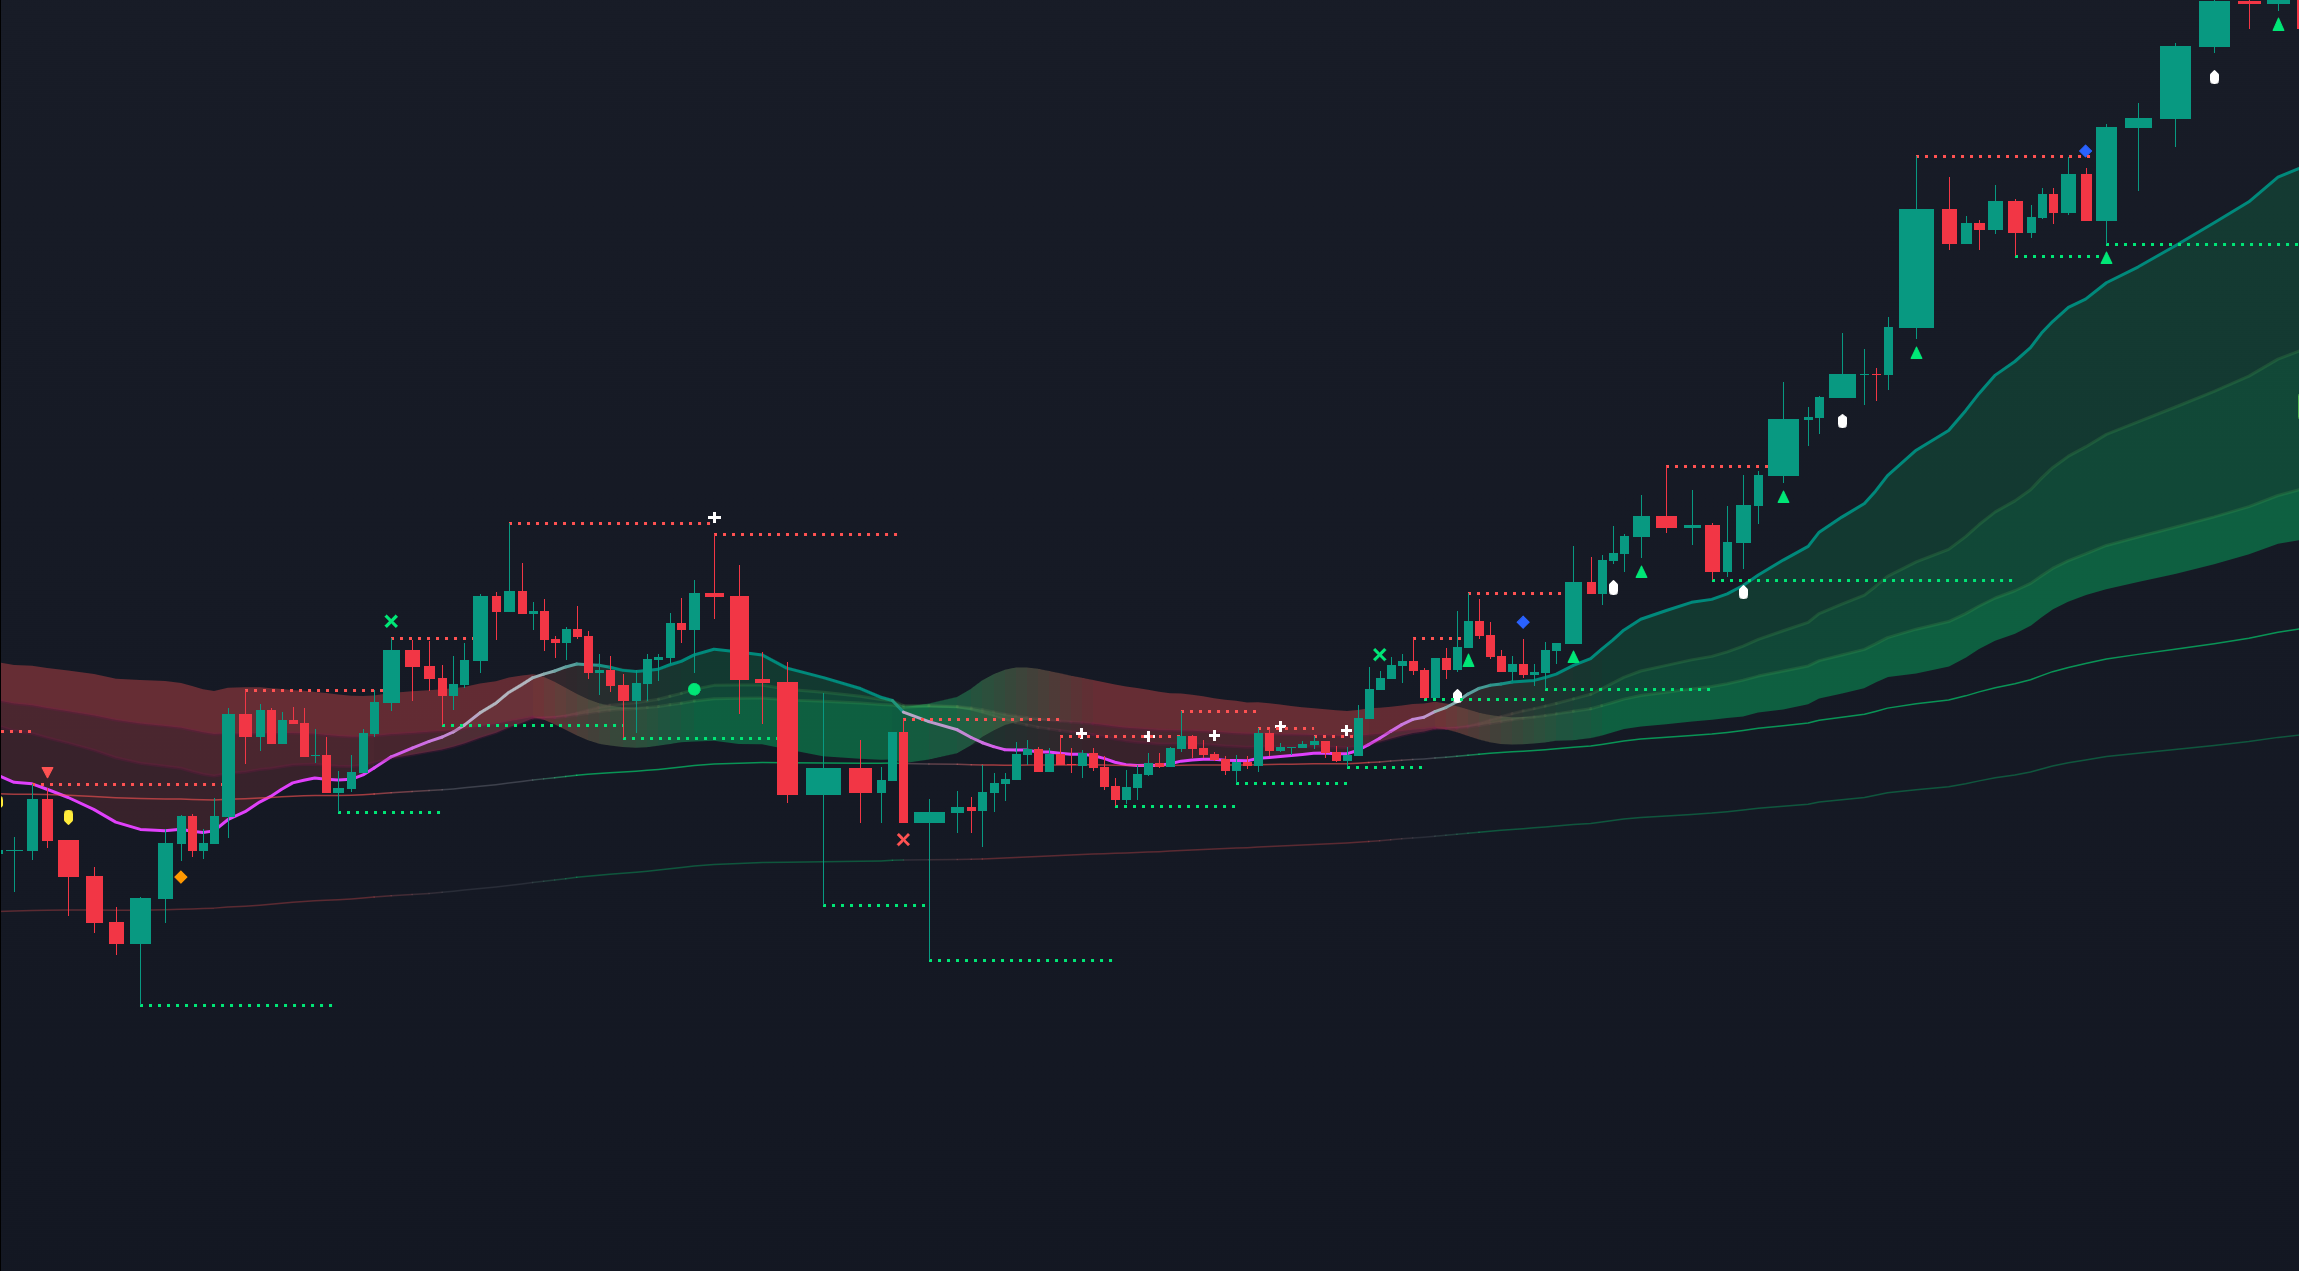
Breakout PRO logo
Suite for discretionary traders

TradingView breakout
indicator built for clarity.

Confirm trend, filter breakouts, score signal quality, and set alerts from one adaptive system-on any symbol or timeframe.

Five engines.
One Decision Framework.

Slide 1 / 5
Structure
Market Structure Engine
Where are we and what regime is this?
Adaptive Cloud + regime
HTF alignment + levels
T1/T2 future lines
Builds a live structural map: trend, regime and targets.
Trade Modes

Pick the Timeframe.
B:Pro Adapts the Logic.

Correlation: after structure + filters + scoring, choose a mode to match your timeframe.

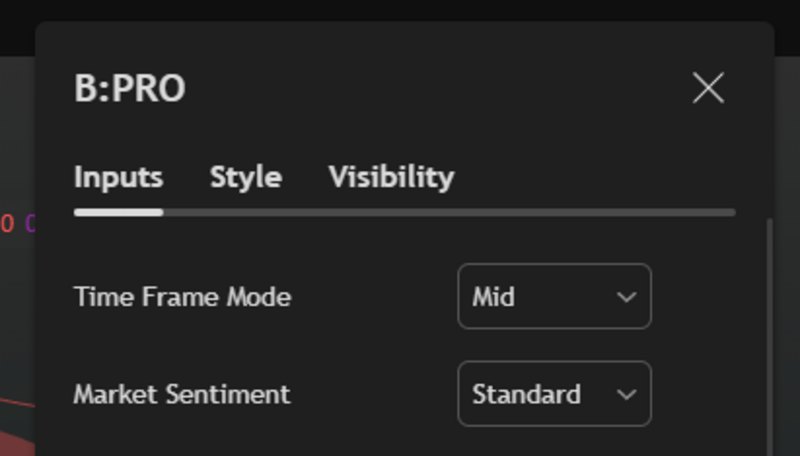
Auto is the recommended default and selects Short, Mid, or Long by timeframe

Short Mode

Scalp velocity

Aggressivness
  • Fast entries, quick exits
  • Tighter ATR + faster EMAs
  • Higher frequency
Best for Below 15m

Mid Mode

Balanced control

Aggressivness
  • Most versatile mode
  • Moderate strictness
  • Adaptive stops
Best for 15m - 4h

Long Mode

Trend stability

Aggressivness
  • Swing & position trading
  • Slower structure bias
  • Max stability
Best for Above 4h
Tip: match the mode to your patience and execution will stay clean.
Market Structure Engine
Adaptive Cloud Layer

Adaptive Trend Cloud

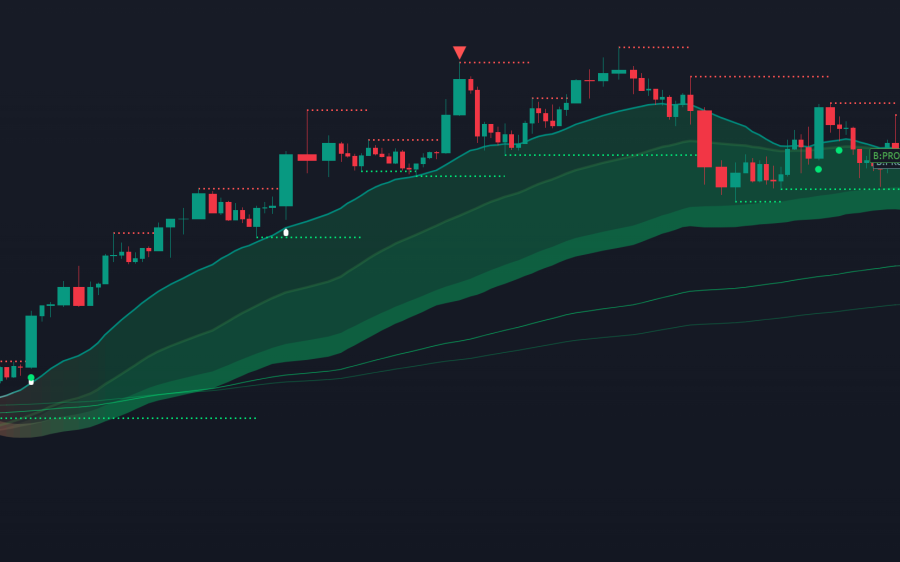
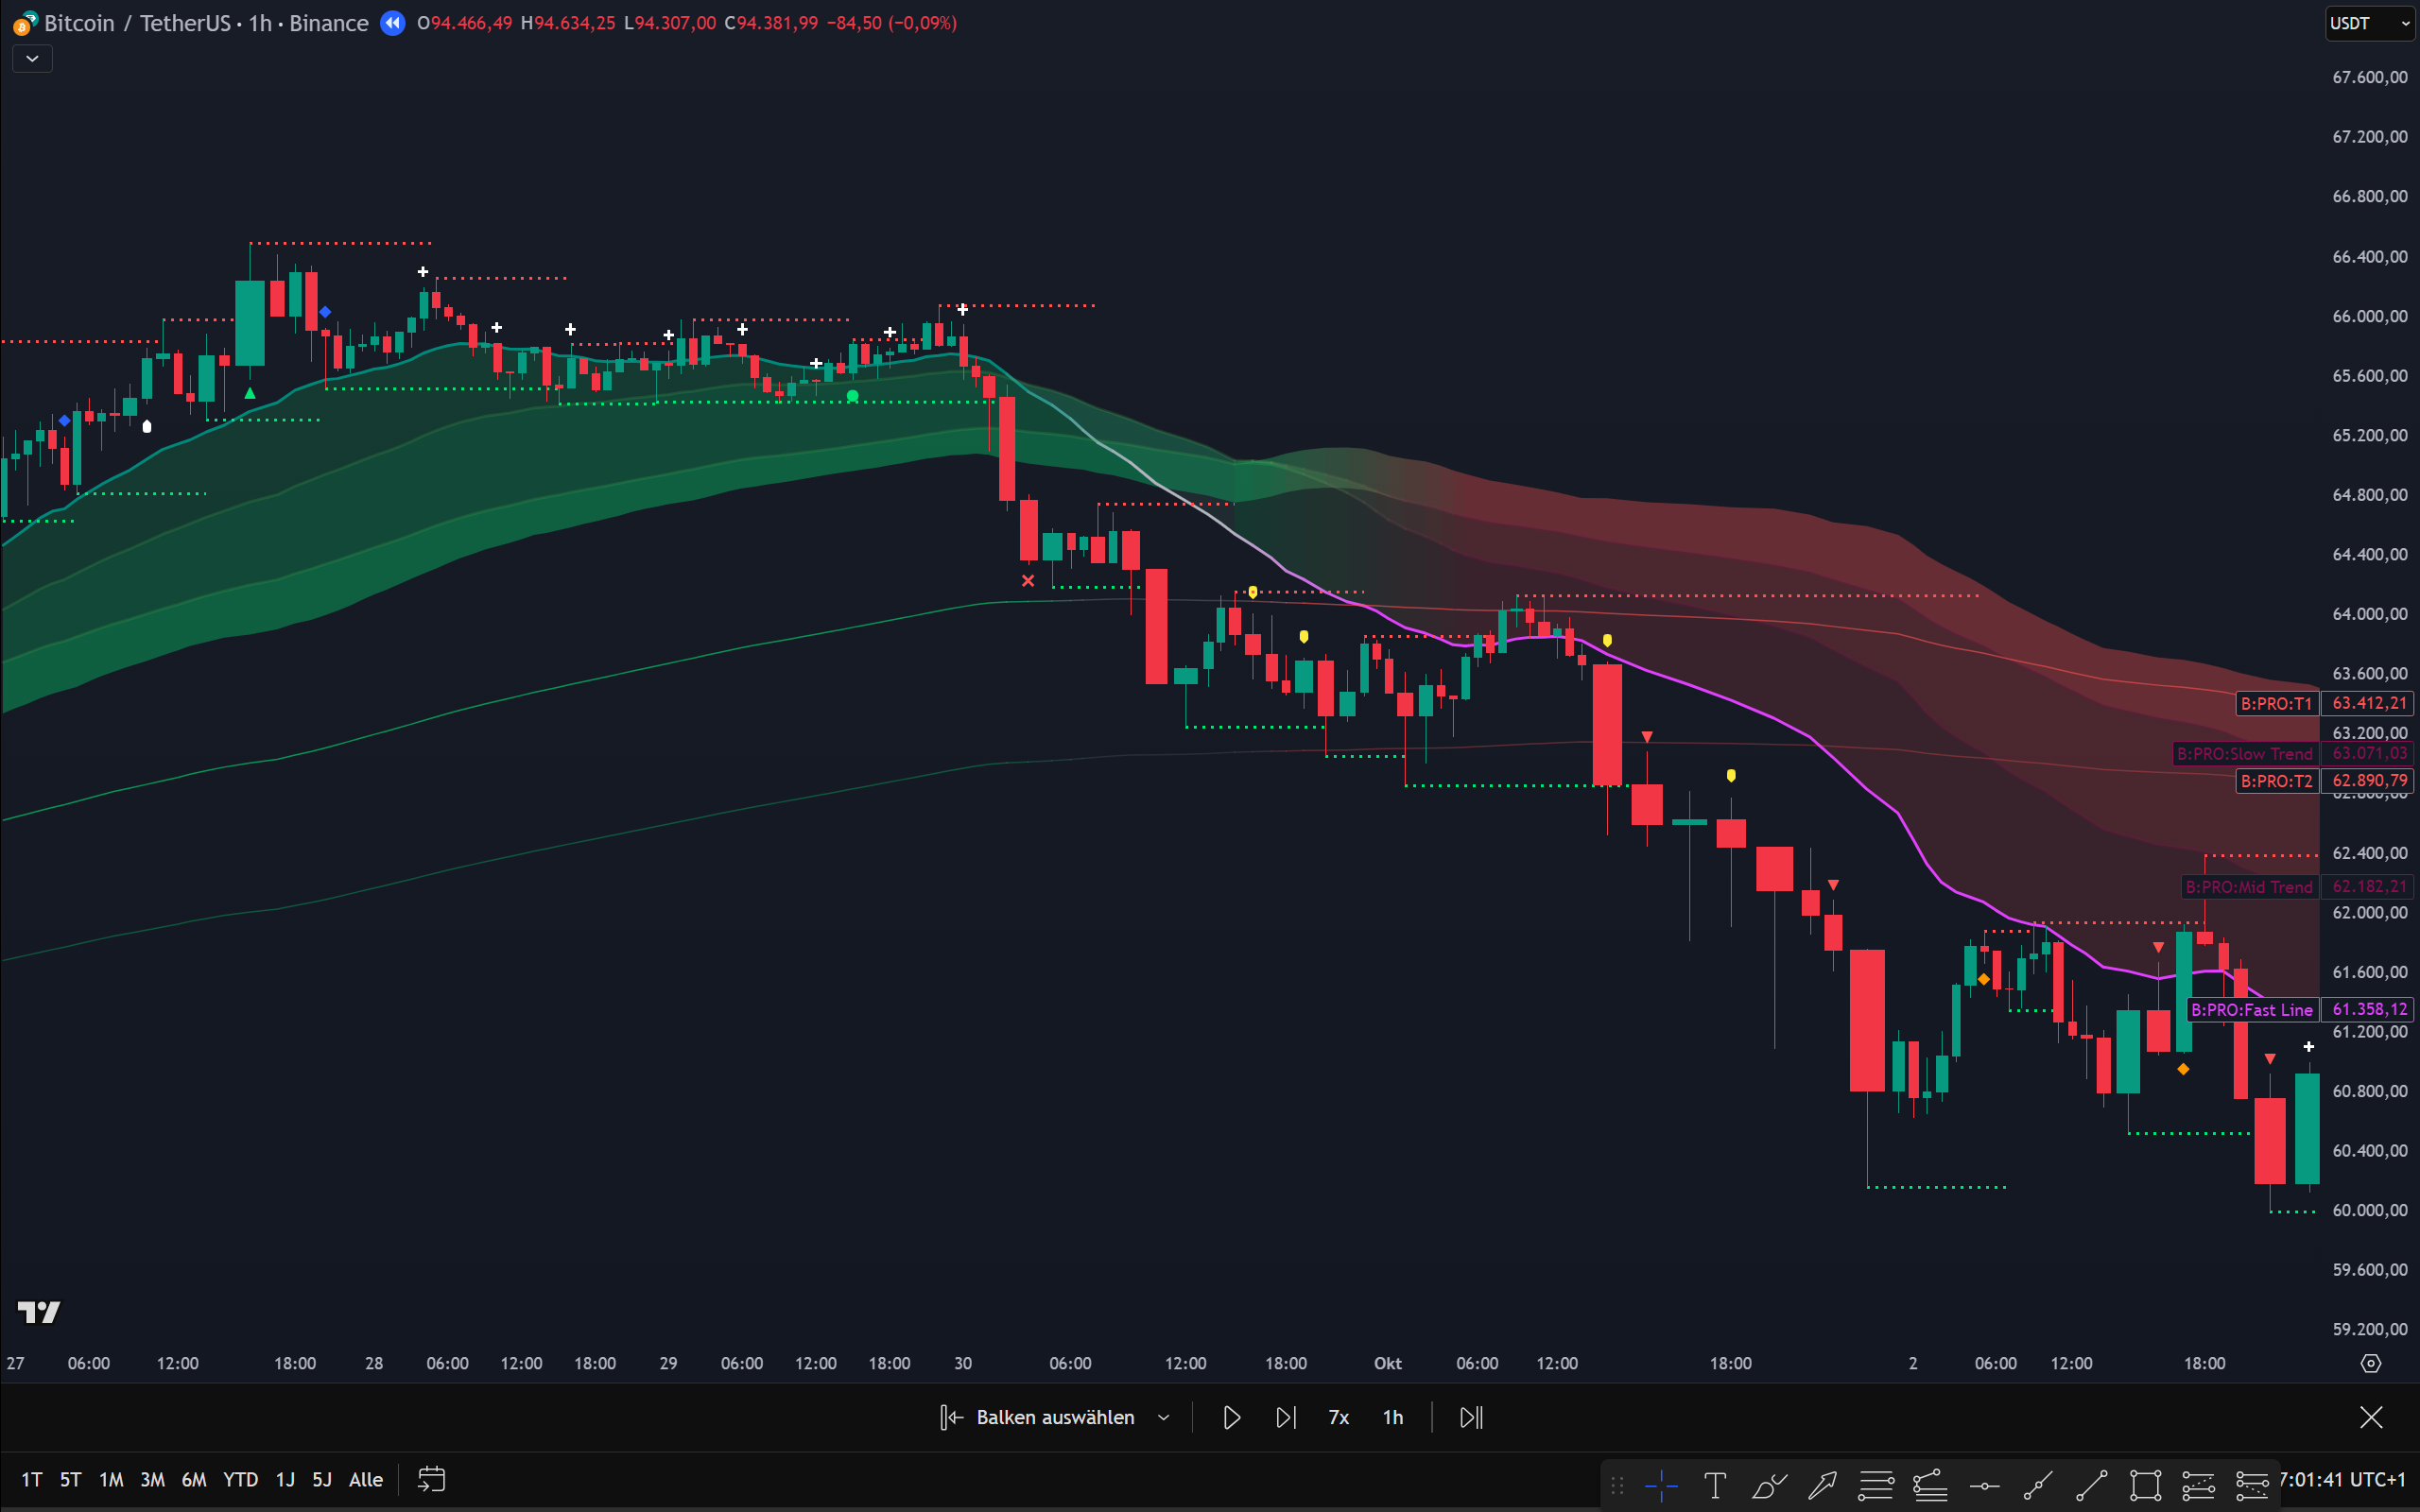
This is the visual backbone of B:Pro’s Market Structure Engine. It tells you where you are and where breakouts might happen before any signal occur.
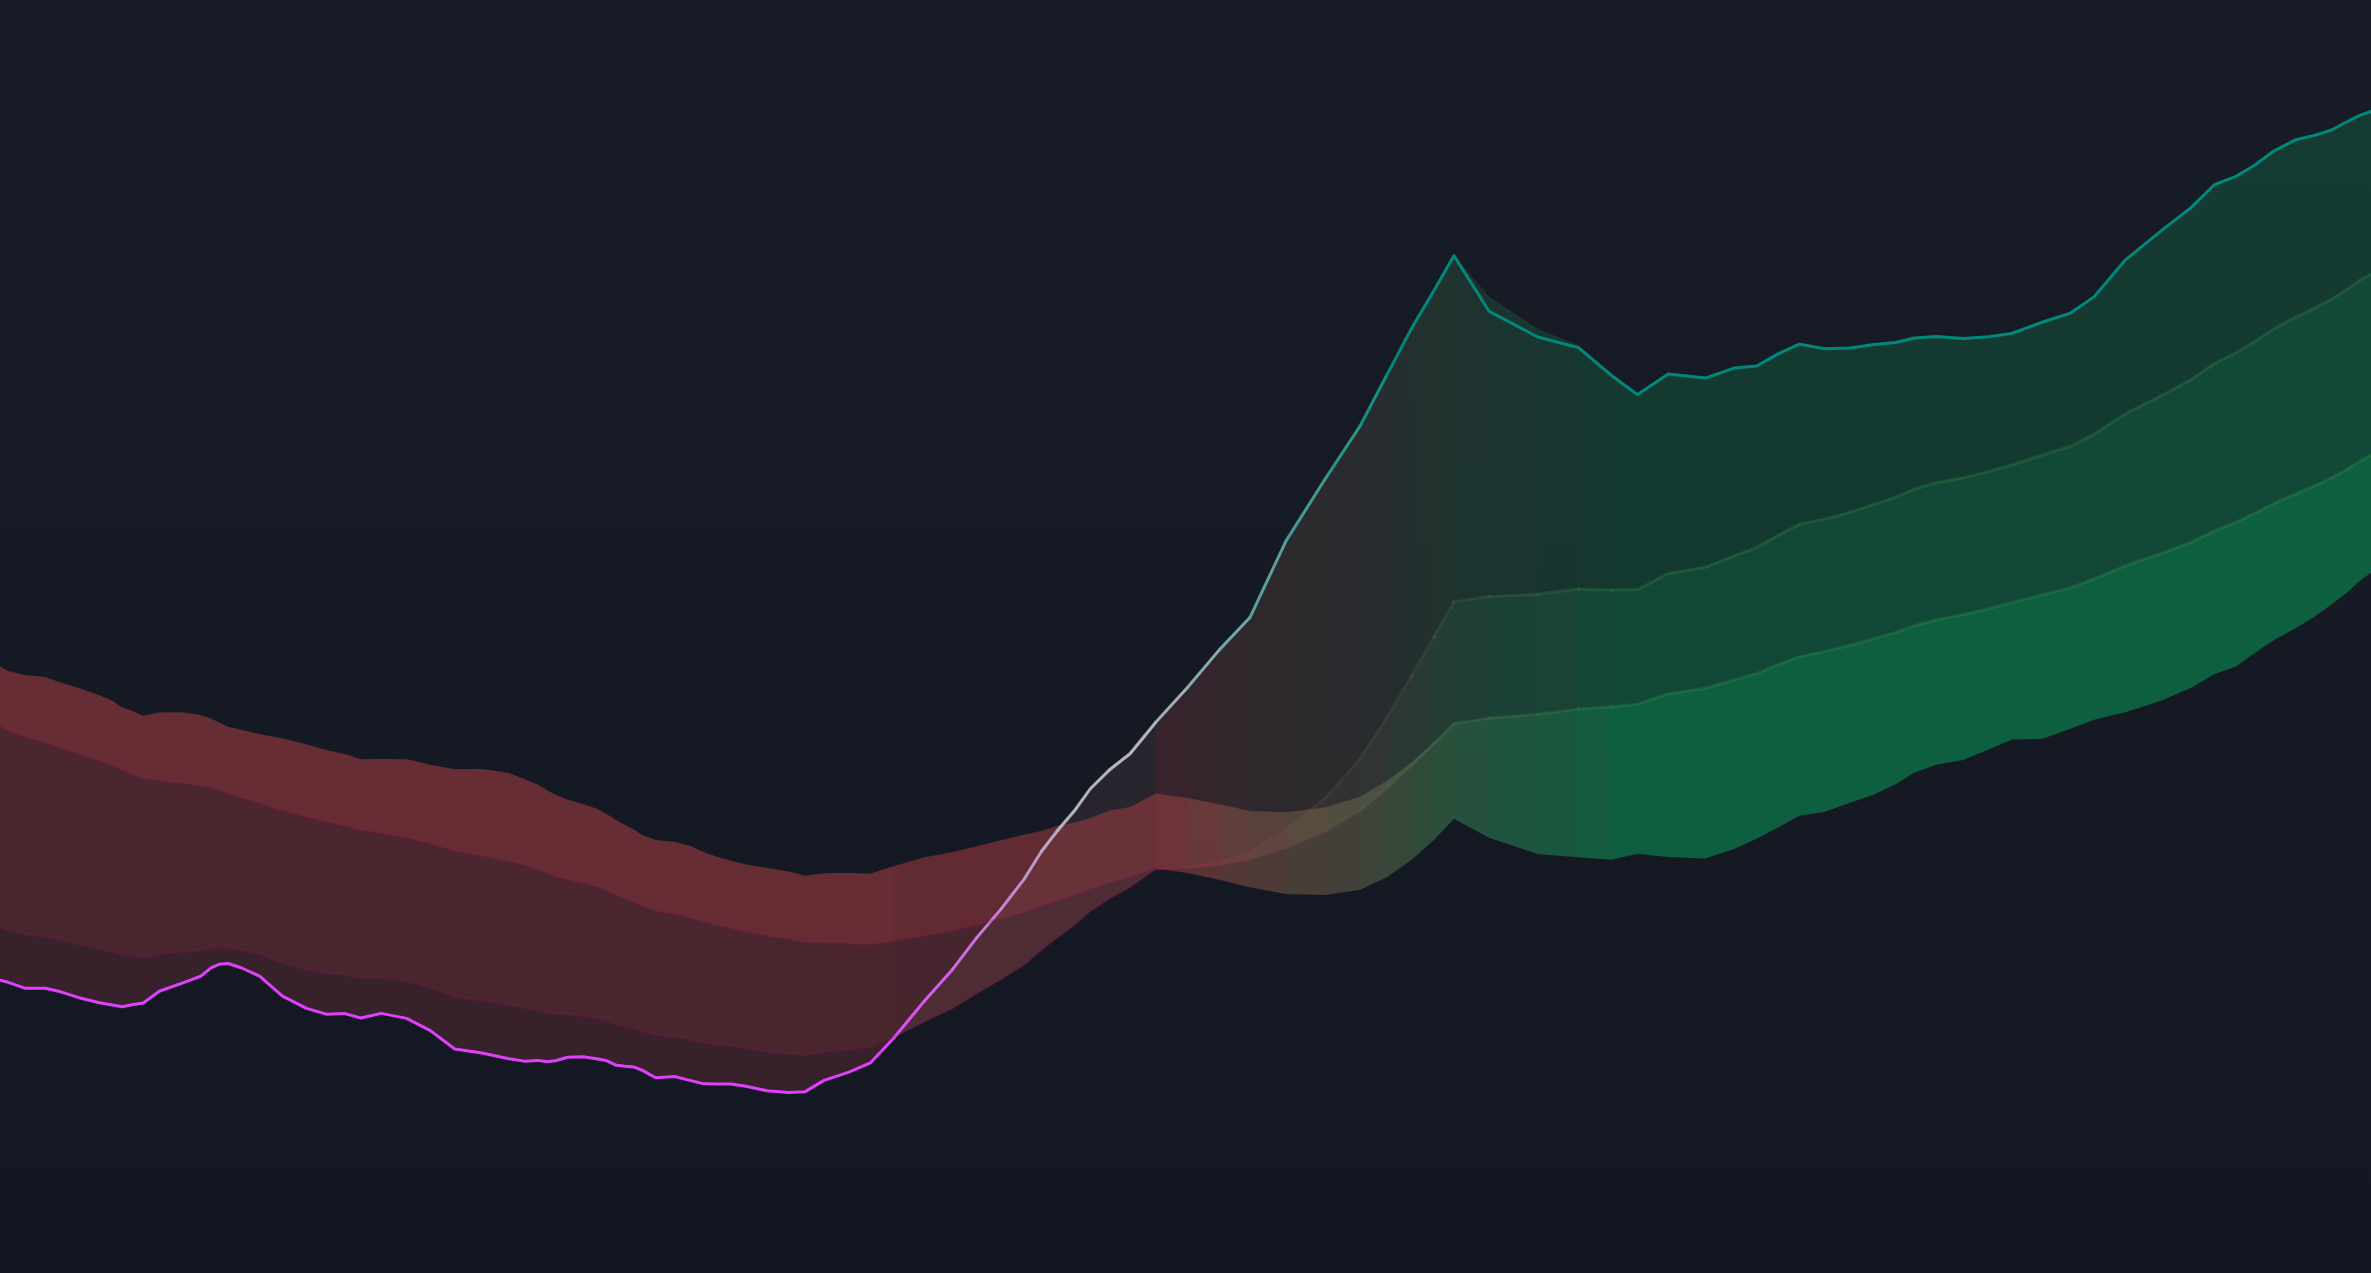
  • 4-layer EMA geometry - fast/mid/slow stack defines regime.
  • ATR padding - smooth transitions, fewer fake flips.
  • Breakout rails - upper/lower cloud boundaries act as trigger context.
Adaptive Cloud in-action
screenshot
Adaptive Trend Cloud: Bull → Neutral → Bear transitions
Bull → Neutral → Bear
Downtrendbreakout zoneUptrend
Market Structure Engine
T1 / T2 Lines

Future Target Lines

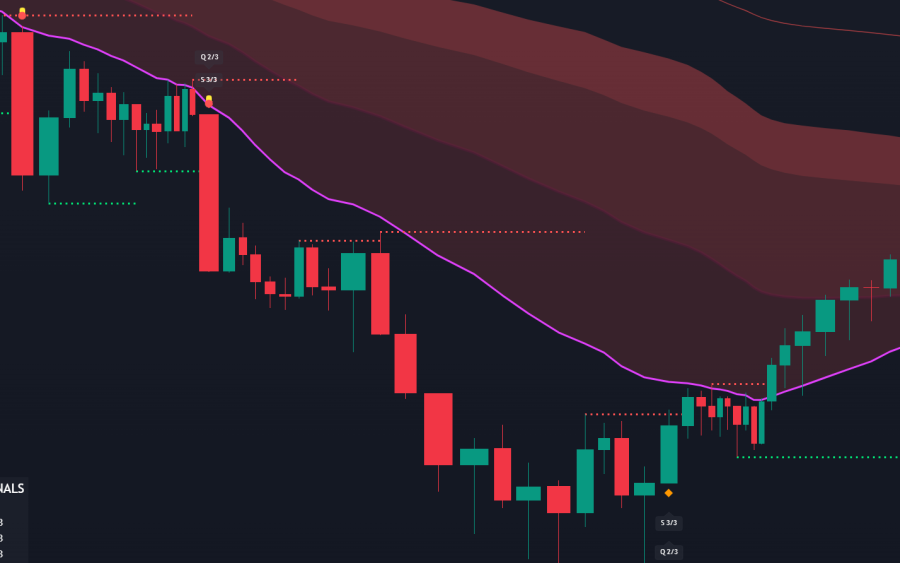
After a breakout, price often interacts with T1 first, then T2 continue or fail. These adaptive EMA lines act as forward structure, giving you clean reaction zones for continuation, failure or partials.
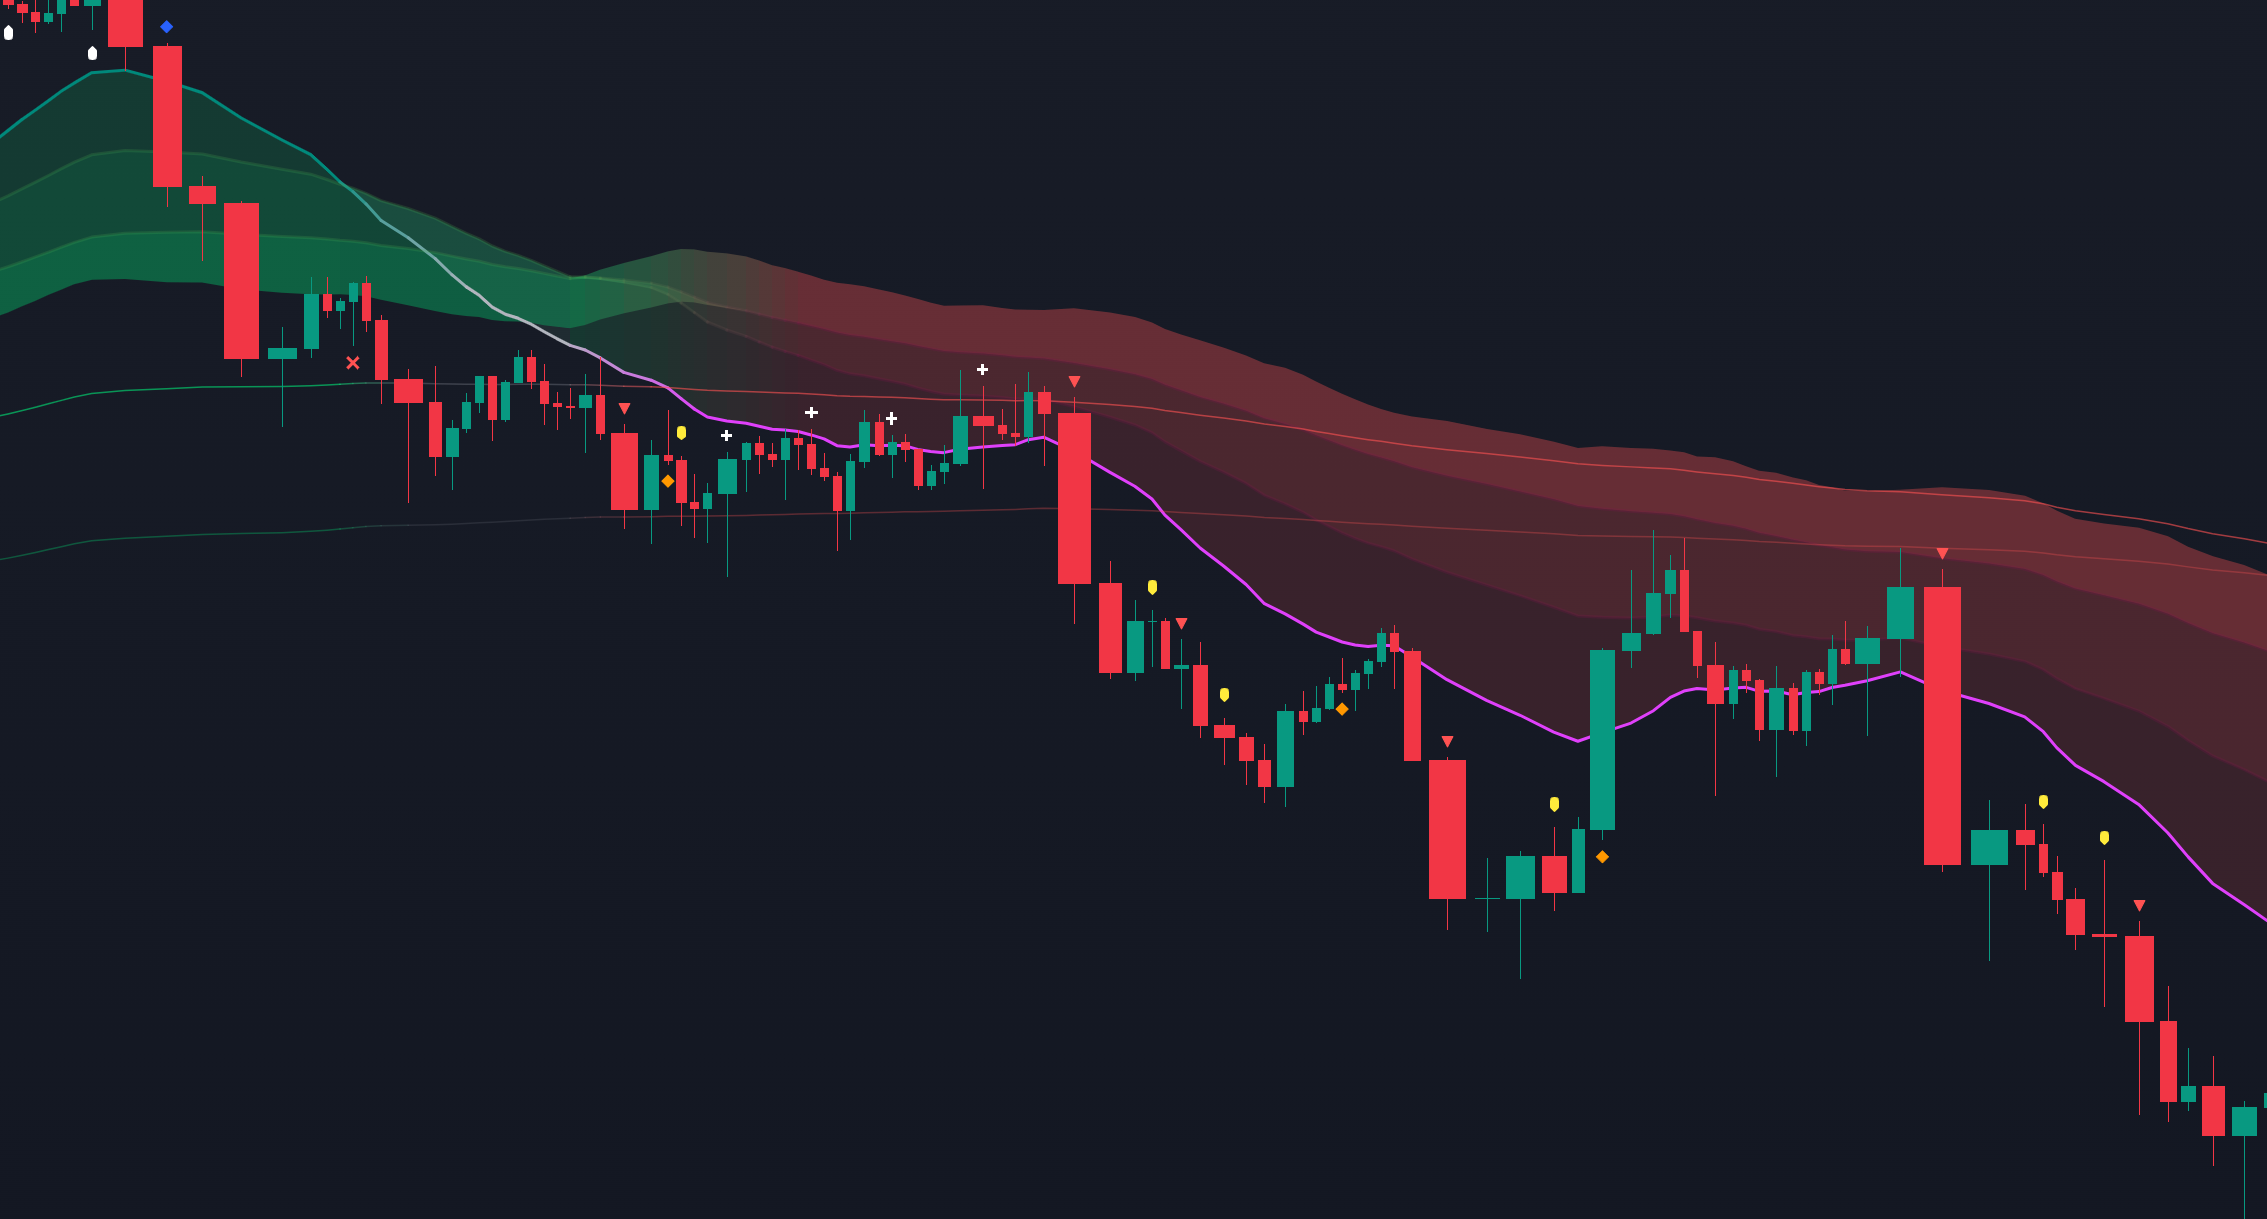
Correlation: breakouts trigger → lines manage the move → exits become objective.
T1 / T2 in-action
1 / 5
From a bullish structure, price rotates downward, interacts with T1 then T2, consolidates between them, and breaks lower.
T1 → T2 flowBreakdown setup
What it shows
From a bullish structure, price rotates downward, first interacting with T1, then T2. After consolidating between these levels, it breaks lower. Future target lines can therefore serve not only as structural references but also as reactive levels that price can respect before failing.
Swipe or use arrows
Engine 2 • Confluence
Permission gates

Filter Engine decides if Trading Conditions are met.

Momentum, volatility, trend and volume act as permission gates. Signals don’t print unless conditions line up with structure.

12+ modulesSentiment modesPer-filter toggles
TradingView overlays
Tap to zoom (clean screenshots win)
Correlation: structure shows where → filters decide if it’s worth acting.

B:PRO Filters

Pick what you want to validate

Signals = structure + permission
Engine 3 • Signal & Execution
Step 3 • Execution

Precise Entry Detection

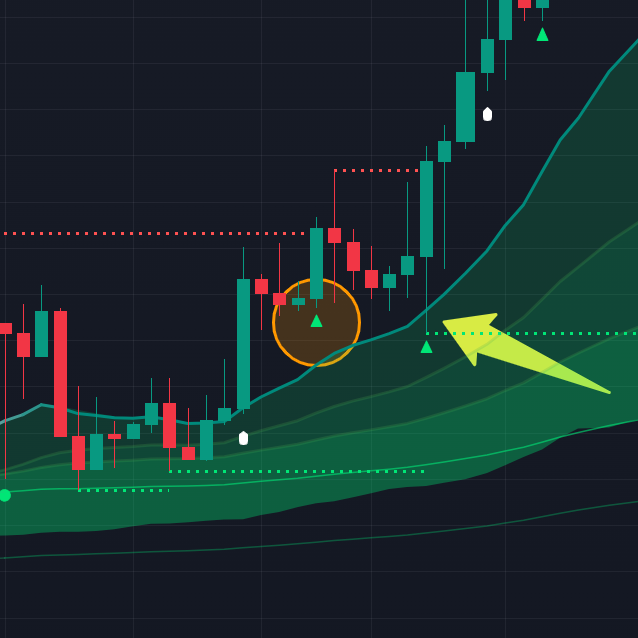
Structure gives direction and filters create clarity. This is where you execute only on clean reactions.
Details
  • Bullish Continuation prints (trend building)
  • Bull Reaction confirms (FAST line holds)
  • Breakout / Trigger (white label) prints
Details
  • Bearish Continuation prints (trend fading)
  • Bear reaction confirms (resistance zone holds)
  • Breakdown / Trigger (yellow label) prints.
Pro Tip: As soon as price touches the fast line, the trade is triggered. Risk is defined by the mid-trend line, with the stop placed slightly below it. The same logic applies in reverse for short setups, with entries, risk, and invalidation mirrored to the downside.
long breakout example
Bull reactionFAST line
Open Long = buy on fast-line touch, SL at mid-trend. Bullish Continuation = trend building. Blue diamond = take profits / close long. Breakout (white label) = likely no fast-line retest. Hold while trend holds.
Signal & Execution ENGINE
Icon Language

Read Signals with Context.
Trade with Clarity.

Instead of more arrows, you get context. Squeeze, invalidation, and continuation signals appear only where price actually reacts.
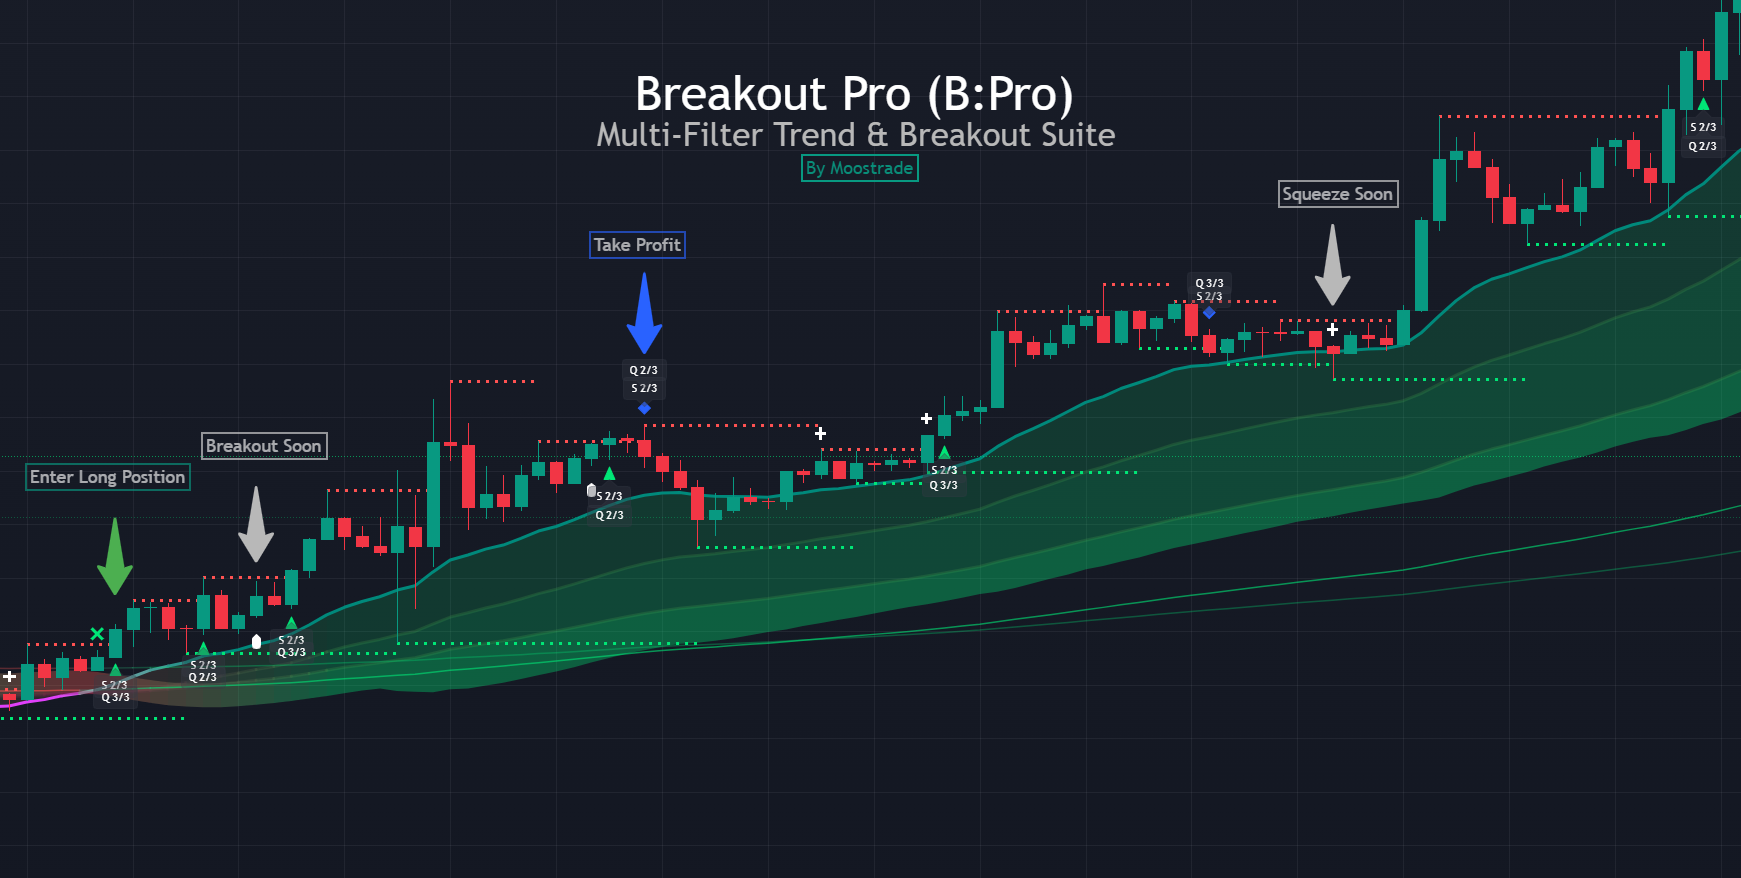
Breakout Logic screenshot showing squeeze, invalidation and continuation icons
Use the icons at reaction zones to reduce guesswork.
Signal Legend
Swipe or use arrows
1 / 3
Open Long
Open Long
Long entry trigger
Open Short
Open Short
Short entry trigger
Breakout
Breakout
Breaks out of range
Breakdown
Breakdown
Breaks down from range
Signal language • visual legend
Decision Intelligence layerRank setups

Score the Decision.

After structure + filters give permission, B:PRO grades the setup with two quick scores:
Safety (risk gates) and Quality (confluence clarity).

Safety
risk + volatility
3 / 3
Quality
confluence + clarity
2 / 3
Correlation: filters validate → scoring ranks what’s worth taking.
SettingsPhone responsive
Last 5 trade signals
S (Safety) + Q (Quality)
  • Open LongS + Q
    Safety3/3
    Quality2/3
  • Bull ContinuationS + Q
    Safety3/3
    Quality2/3
  • Cross UpS + Q
    Safety3/3
    Quality2/3
  • Cross DownS + Q
    Safety2/3
    Quality1/3
  • Open ShortS + Q
    Safety1/3
    Quality2/3
Make it stricter in Settings
Profit Cases

Transparent Proof
You Can Verify Yourself.

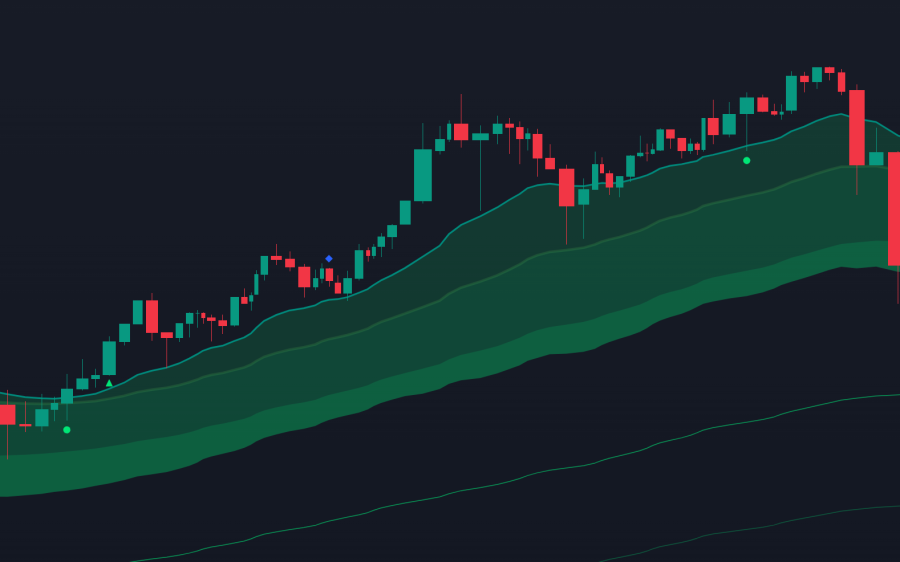
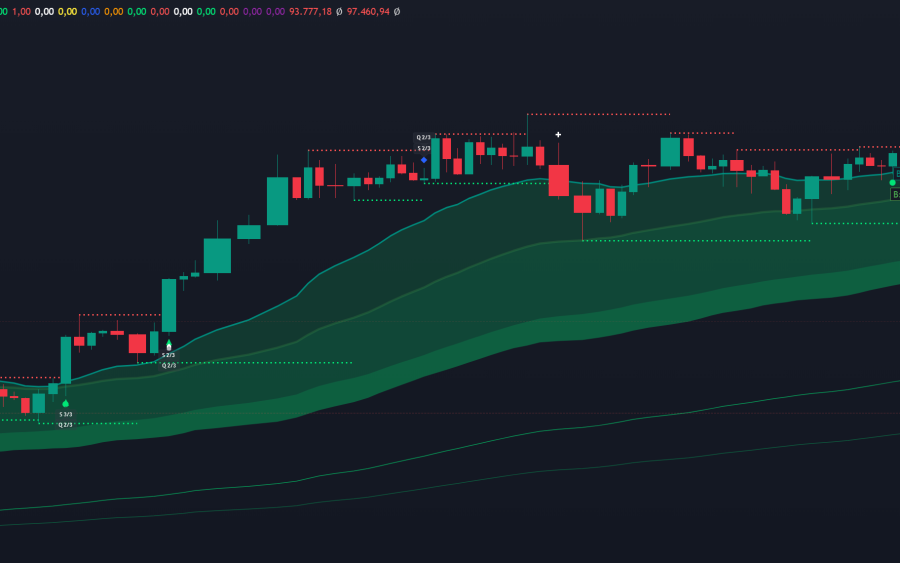
Every trade includes detailed screenshots, complete with a clear explanation of the “why” behind it. You’ll get the full market context, the specific signal type, and the exact conditions that made the trade valid.
Slide 1 / 3·
BTC / USDT profit case
Open Long4H
Result
19.9%
BTC / USDT
Mid - Standard mode long
Timeframe 4H - Mid Trendmode
Entry: After Open Long, Signal at the Fast Line
SL: at Midtrend Line
case
BTC / USDT profit case
Open Long4H
Result
8.1%
BTC / USDT
Mid - Standard mode long
Timeframe 4H - Mid Trendmode
Entry: After Open Long, Signal at the Fast Line
SL: Close Long / Fast Line / Midtrend Line
case
BTC / USDT profit case
Open Long2H
Result
5.62%
BTC / USDT
Mid - Standard mode breakout long
Timeframe 2H - Mid trademode
Breakout symbol: price may not touch Fast Line before continuing uptrend
SL: at Midtrend Line
case
BTC / USDT profit case
Open Short1H
Result
3.1%
BTC / USDT
Mid - Standard mode breakdown short
Timeframe 1h - Mid trandemode
Yellow breakdown symbol: price may not touch Fast Line before trend continues
SL: at Midtrend Line
case
Workflow

How to Trade with B:Pro - Clear and Structured.

Candle-close confirmation = rule.
B:PRO workflow step 1
Step 1 / 6
FAQ

Frequently Asked Questions.

B:PRO is a trading system that combines structure, trend context, filter validation, and scoring to guide decisions only when conditions align.
Verified framework logic

Stop Guessing.
Trade with Structure.

A TradingView indicator built like a decision engine.

Billing starts at checkout
Trade with a system.

Breakout PRO reduces noise and forces alignment - so you take cleaner trades and manage them with confidence.
Regime map
Structure first
Trend Cloud + HTF structure so you always know the regime.
9-layer filter
Permission gating
Confluence + sentiment filters so you only trade what fits.
S/Q score
Decision grading
Safety & Quality scoring so you stay selective under pressure.
Risk engine
Lifecycle management
ATR + invalidation logic for risk and exits from open to close.
USD 29.99/month - billing starts at checkout - works on any market